The best delicious Brownie Tortoni recipe with easy-to-follow step-by-step instructions that are straightforward and foolproof. Try this Brownie Tortoni recipe today!
Hello there, my baking family! This Brownie Tortoni recipe is here just in time for Christmas, it’s perfect for holiday gatherings or as a special treat for those chilly December nights. The combination of rich chocolate and cool peppermint is like a jolly dance of flavors in your mouth!
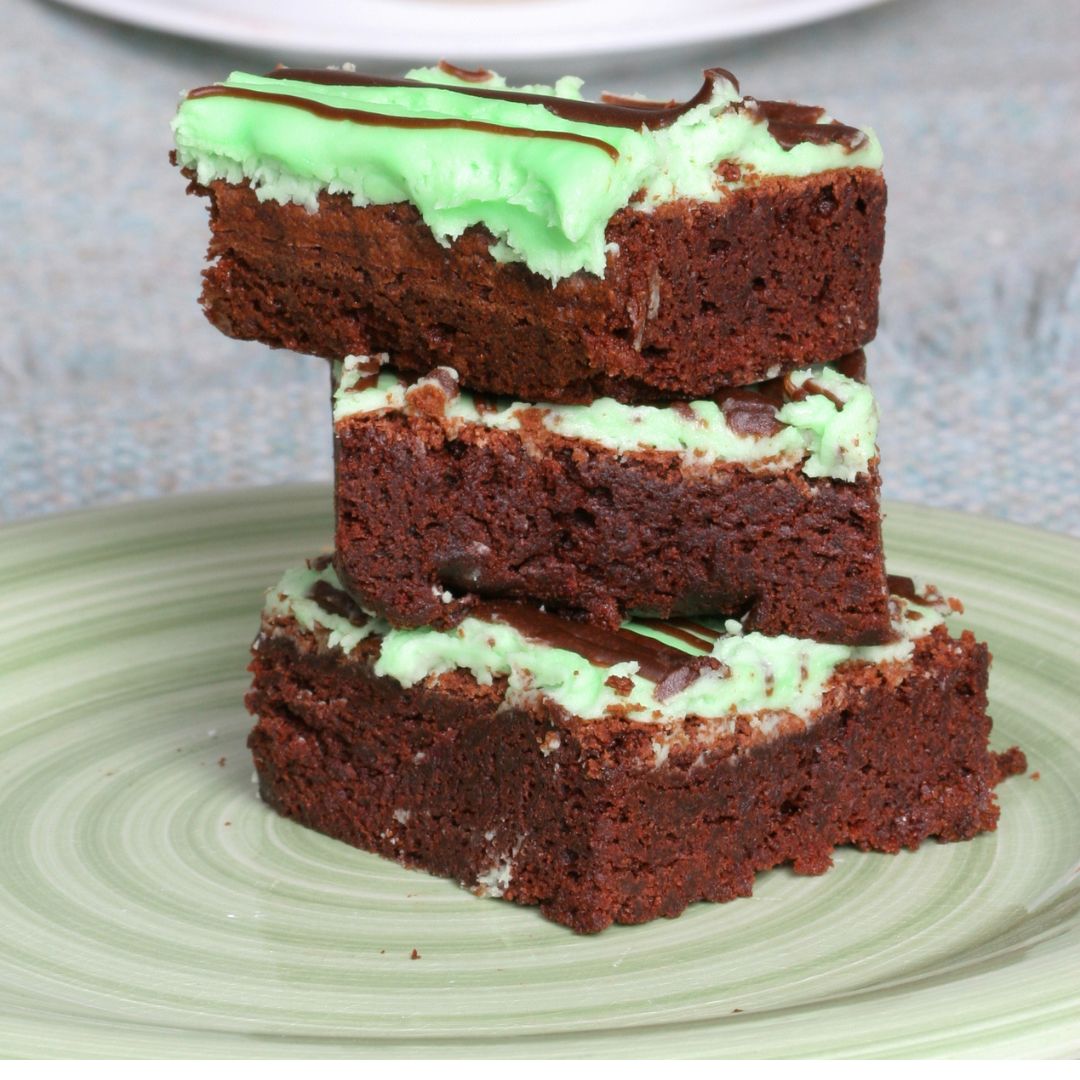
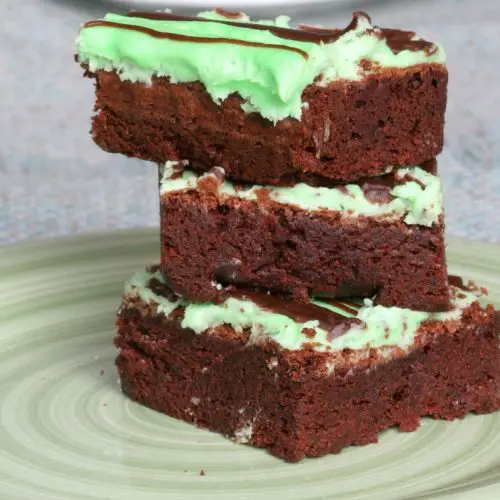
Peppermint Green Brownie Tortoni: A Twist on the Classic!
Today, I’m thrilled to share with you a treasured recipe from my baking collection, the Peppermint Green Brownie Tortoni. It’s a delightful twist on the classic brownie, infused with a minty, creamy layer that’s just perfect for the holiday season or any day when you’re in the mood for something uniquely delicious.
This recipe is a celebration of holiday flavors, the deep, rich chocolate of traditional brownies paired with a refreshing burst of peppermint, like a cool winter breeze. The base is a classic brownie, dense and chocolatey, topped with a light and airy peppermint tortoni layer, painted in festive green. Whether it’s gracing your holiday table, shared at a gathering, or enjoyed quietly with a cup of tea, this dessert is a versatile crowd-pleaser that’s sure to elicit smiles and delighted sighs.

Why Our Peppermint Brownie Tortoni is a Holiday Must-Try
- Holiday Dessert Perfection: This isn’t just another brownie recipe; it’s a festive fusion that brings the richness of brownies and the cool zing of tortoni together. Perfect for Christmas gatherings or a cozy night in, these brownies are a delight for both the eyes and the palate.
- Meticulously Crafted: As a baker, I understand the importance of the right ingredients. From the unsweetened baking chocolate to the peppermint extract, every component has been chosen to create a harmonious blend of flavors that scream ‘holiday spirit’.
- Visually Enticing: When you take this dessert out of the freezer, what you get is a visually stunning green and brown contrast that’s as appealing to the eye as it is to the taste buds. It’s not just a dessert; it’s a centerpiece.
- Experience and Expertise: With inspiration from classic recipes and a touch of personal creativity, this recipe is more than just mixing ingredients; it’s about sharing the joy of holiday baking. And I’m here to guide you through each step.
Ingredients for Brownie Tortoni
- Unsweetened Baking Chocolate: The foundation of our brownie layer, offering a deep, rich chocolate flavor.
- Butter: Adds richness and ensures your brownies are moist and delicious.
- Sugar, Eggs, Vanilla: The essentials for any brownie, contributing to the sweet, comforting flavor and smooth texture.
- All-Purpose Flour: The backbone of the brownie, giving it structure and chewiness.
- Miniature Marshmallows and Milk: Transform into a creamy, minty layer that sits atop the brownie.
- Peppermint Extract and Green Food Coloring: The heart of the tortoni layer, bringing in that festive, minty flavor and vibrant green color.
- Heavy Cream: Whipped into soft peaks, this adds lightness and creaminess to the tortoni layer.
Baker Tips To Make The Best Brownie Tortoni
- Quality Ingredients: The choice of high-quality unsweetened chocolate and butter is pivotal. Opt for the best you can find as they are the foundation of your brownie’s flavor profile. The richer the chocolate and the creamier the butter, the more decadent your Brownie Tortoni will be.
- Precise Measurements: Baking is as much an art as it is a science. Use a digital scale for ingredients like flour and sugar. Accurate measurements are key to achieving the perfect balance of flavors and textures in your brownies.
- Proper Chocolate Melting: For melting your chocolate, use the microwave method as described in your recipe. Start with 1 minute on high, then continue in 30-second bursts, stirring frequently. This careful, gradual approach helps avoid overheating. Keep a close eye on the temperature, aiming not to exceed 90°F (32°C) for dark chocolate.
- Don’t Overmix: Once the flour is added to your batter, mix just until it’s incorporated. Overmixing at this stage can activate the gluten in the flour, resulting in a denser, tougher brownie. A light hand will yield a more tender crumb.
- Cooling & Chilling: Cooling is crucial in multi-layered desserts like this. Ensure the brownie base is completely cool before adding the peppermint layer. This prevents the layers from blending and helps achieve a clear, distinct tortoni layer. After adding this layer, sufficient chilling is necessary for it to set properly, enhancing the overall texture and flavor profile of your dessert.
How To Make Brownie Tortoni
- Preheating and Pan Preparation: Begin by setting your oven to 350-degrees F. This steady, moderate temperature is ideal for brownies. Then, generously grease your 13x9x2-inch baking pan. A well-greased pan ensures your brownies will release easily, preserving their perfect shape and texture.
- Melting Chocolate and Butter: In a medium, microwave-safe bowl, combine the butter and chocolate. Microwave for 1 minute on high. After this initial heat, give the mixture a thorough stir. The residual heat will help melt the chocolate evenly. If needed, continue microwaving in short 30-second bursts, stirring after each interval. The goal is a velvety, homogenous mixture – the base of your brownie’s flavor.
- Combining Wet Ingredients: Once your chocolate mixture is smooth, stir in the sugar. Then, add the eggs and vanilla, gently mixing them in. Be cautious not to overbeat at this stage; we want to avoid incorporating too much air into the batter, which can affect the brownies’ texture.
- Incorporating the Flour: Gently fold in the flour. This step is crucial: fold until just combined to keep the brownies dense and fudgy. Overmixing after adding flour can create a cake-like texture, which isn’t what we’re aiming for in a classic brownie.
- Baking the Brownie Base: Pour the batter into your prepared pan, smoothing it into an even layer. Bake for 30 to 35 minutes. To test for doneness, insert a toothpick into the center. If it comes out with a few moist crumbs, the brownies are perfectly baked. Let the brownies cool completely in the pan set on a wire rack. Cooling is essential as it sets the brownies and makes the addition of the next layer easier.
- Preparing the Marshmallow Layer: In another microwave-safe bowl, combine marshmallows and milk. Microwave for 2 minutes, then stir until smooth. The marshmallows should be fully melted into a creamy consistency. Add peppermint extract and green food coloring, adjusting to your preferred intensity of flavor and color. Chill this mixture until slightly thickened, ensuring it’s firm enough to hold up when folded into the whipped cream.
- Layering and Freezing: Fold the whipped cream into your chilled marshmallow mixture, creating a light, fluffy layer. Gently spread this over your cooled brownie base. Freeze the combined dessert to solidify the layers, turning it into a cohesive, sliceable treat.
- Thawing and Garnishing: Before serving, transfer the Brownie Tortoni from the freezer to the refrigerator for about 30 minutes. This resting period makes slicing easier and improves the eating experience. Finally, garnish with drizzed chocolate for a delicious finish.
Craving More Decadence? Discover Our Collection of Irresistible Brownie Recipes!
- Walnut Brownies
- Butterscotch Brownies
- Fudge Brownies With Glaze
- Fudge Nut Brownies
- Marble Fudge Brownies
Frequently Asked Questions
Yes, you can substitute unsweetened baking chocolate with a dark or semi-sweet chocolate, but adjust the sugar in the recipe accordingly to maintain the balance of sweetness.
The best way to check is to insert a toothpick into the center. If it comes out with a few moist crumbs, the brownies are done. If it comes out clean, they may be overbaked, and if there’s wet batter, they need more time.
If you don’t have a microwave, you can melt the chocolate and butter using a double boiler on the stove. For the marshmallows, gently heat them with the milk over low heat, stirring constantly until melted and smooth.
Absolutely! You can prepare the Brownie Tortoni up to 2 days in advance. Keep it in the freezer, and transfer it to the refrigerator 30 minutes before serving. It’s a great make-ahead dessert for gatherings.
Yes, you can make this brownie tortoni recipe gluten-free by substituting the all-purpose flour with your preferred gluten-free flour blend. Just ensure it’s a 1:1 substitution and the blend is suitable for baking.
Peppermint Marshmallow Brownie Tortoni
Ingredients
- 3/4 cup Butter unsalted works best!
- 3 oz Unsweetened Baking Chocolate bar or chips, your choice!
- 1 1/2 cups Sugar
- 3 Eggs
- 1 1/4 tsp Vanilla Extract
- 1 1/8 cups All-Purpose Flour
- 3 1/2 cups Miniature Marshmallows
- 1/4 cup Milk
- 4 drops Peppermint Extract feel free to adjust!
- 3 drops Green Food Coloring
- 1 cup Heavy Cream
Instructions
- Begin by setting your oven to 350-degrees F. This steady, moderate temperature is ideal for brownies. Then, generously grease your 13x9x2-inch baking pan. A well-greased pan ensures your brownies will release easily, preserving their perfect shape and texture.
- In a medium, microwave-safe bowl, combine the butter and chocolate. Microwave for 1 minute on high. After this initial heat, give the mixture a thorough stir. The residual heat will help melt the chocolate evenly. If needed, continue microwaving in short 30-second bursts, stirring after each interval. The goal is a velvety, homogenous mixture – the base of your brownie’s flavor.
- Once your chocolate mixture is smooth, stir in the sugar. Then, add the eggs and vanilla, gently mixing them in. Be cautious not to overbeat at this stage; we want to avoid incorporating too much air into the batter, which can affect the brownies’ texture.
- Gently fold in the flour. This step is crucial: fold until just combined to keep the brownies dense and fudgy. Overmixing after adding flour can create a cake-like texture, which isn’t what we’re aiming for in a classic brownie.
- Pour the batter into your prepared pan, smoothing it into an even layer. Bake for 30 to 35 minutes. To test for doneness, insert a toothpick into the center. If it comes out with a few moist crumbs, the brownies are perfectly baked. Let the brownies cool completely in the pan set on a wire rack. Cooling is essential as it sets the brownies and makes the addition of the next layer easier.
- In another microwave-safe bowl, combine marshmallows and milk. Microwave for 2 minutes, then stir until smooth. The marshmallows should be fully melted into a creamy consistency. Add peppermint extract and green food coloring, adjusting to your preferred intensity of flavor and color. Chill this mixture until slightly thickened, ensuring it’s firm enough to hold up when folded into the whipped cream.
- Fold the whipped cream into your chilled marshmallow mixture, creating a light, fluffy layer. Gently spread this over your cooled brownie base. Freeze the combined dessert to solidify the layers, turning it into a cohesive, sliceable treat.
- Before serving, transfer the Brownie Tortoni from the freezer to the refrigerator for about 30 minutes. This resting period makes slicing easier and improves the eating experience. Finally, garnish with drizzed chocolate for a delicious finish.
Notes
-
Ingredient Substitutions:
- For a richer chocolate flavor, you can use a combination of unsweetened and semi-sweet chocolate.
- If you don’t have green food coloring, the peppermint layer will still taste great without it. The coloring is mainly for visual appeal.
-
Texture and Flavor Tips:
- For a more intense peppermint flavor, you can adjust the amount of peppermint extract. Start with the recommended amount and add more to taste.
- If you prefer a less sweet dessert, reduce the sugar slightly in the brownie base.
-
Storage Instructions:
- The Brownie Tortoni can be stored in the freezer for up to a month. Wrap it well to avoid freezer burn.
- For best texture, let it thaw in the refrigerator for about 30 minutes before serving.
-
Serving Suggestions:
- Serve with a dollop of whipped cream or a scoop of vanilla ice cream for an extra decadent treat.
- A sprinkle of crushed peppermint candies or a dusting of cocoa powder can add a festive touch for holiday serving.
- Making in Advance:
- You can bake the brownie base a day in advance. Just add the peppermint layer the next day and freeze as per the instructions.


Leave a Reply